
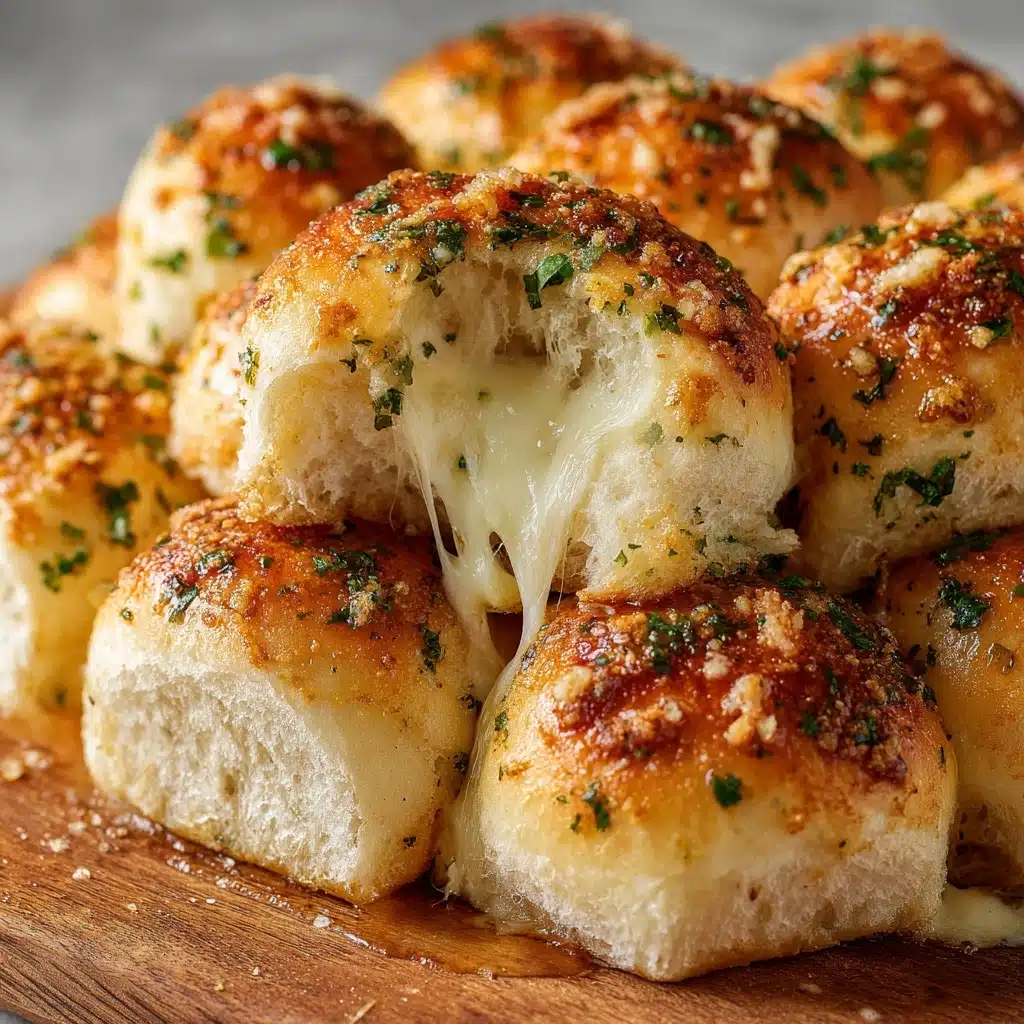
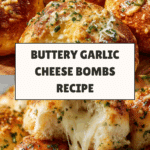
Buttery Garlic Cheese Bombs Recipe
Imagine pulling apart a warm, golden roll only to discover a gooey, melted core of cheese bursting through a pillowy bread pocket, all drenched in fragrant garlic butter. That’s the magic of Buttery Garlic Cheese Bombs—an irresistible, bite-sized treat that makes game nights, family gatherings, or cozy evenings feel downright festive. There’s nothing fussy or complicated here, just big comfort and big flavor packed into every single bite.

Ingredients You’ll Need
The ingredients list for Buttery Garlic Cheese Bombs is the kind you’ll treasure: simple, accessible, and each one adds its own little spark to the final result. Every item plays a starring role, creating blissful pockets of gooey cheese, a tender crust, and that unmissable buttery garlic finish.
- Refrigerated biscuit dough: Flaky, tender, and speedy—these biscuits guarantee a perfect base in minutes.
- Mozzarella or cheddar cheese cubes: Pick your favorite melty cheese for that unforgettable stretch and richness at the center.
- Unsalted butter, melted: The heart of buttery goodness that soaks into every bite—don’t skimp.
- Fresh garlic, minced (or garlic powder): Fresh garlic gives you punchy, aromatic flavor, while garlic powder is great for convenience and gentler taste.
- Fresh parsley, finely chopped (optional): Add this for pops of color and a fresh finish, or skip it if you crave classic comfort.
How to Make Buttery Garlic Cheese Bombs
Step 1: Preheat the Oven
Start by heating your oven to 375°F (190°C). Lining your baking sheet with parchment paper is an easy little trick—it means no sticking, no scrubbing, and perfect cheese bombs that lift off with ease.
Step 2: Prepare the Biscuits
Crack open that can of biscuit dough and gently pull apart the rounds. Flatten each biscuit ever so slightly with your fingers, just enough to make space for the magic inside without making holes. Think of these discs as tiny blank canvases for pure comfort food artistry.
Step 3: Add the Cheese
Place a cube of mozzarella or cheddar right in the center of each biscuit. Carefully fold the dough around the cheese and pinch it tight—really seal those edges to keep the melty cheese surprise inside. Now roll each one into a smooth little ball, no leaks allowed!
Step 4: Arrange on the Baking Sheet
Set each completed cheese bomb seam side down on the prepared baking sheet. Leave a little space between each one—they’ll puff up as they bake and become crisp and golden all over.
Step 5: Make the Garlic Butter
In a small bowl, stir together the melted butter, minced garlic (or the trusty garlic powder), and the chopped parsley if you’re using it. The aroma alone is enough to get everyone wandering into the kitchen.
Step 6: Brush with Garlic Butter
Grab a pastry brush and lavishly paint the tops of each cheese bomb with the garlic butter mixture. Don’t use it all yet—hold back a little for a final glossy touch after baking that makes the Buttery Garlic Cheese Bombs shine and intensifies their flavor.
Step 7: Bake
Bake for 10 to 12 minutes, or until the cheese bombs are puffed, deeply golden, and just begging to be devoured. Watch that cheese doesn’t escape—when you see just a touch of bubbling near the base, they’re ready for their final flourish.
Step 8: Finish and Serve
Pull the cheese bombs from the oven and brush them with the rest of your garlicky butter. Serve them warm, let everyone pull them apart and experience that epic melt-in-the-middle moment. These are best enjoyed fresh, but you’ll see the platter vanish in a flash.
How to Serve Buttery Garlic Cheese Bombs
Garnishes
For that little extra, sprinkle on more chopped parsley, a dash of grated Parmesan, or a sprinkle of cracked black pepper right as they come out of the oven. The fresh herbs add a bright pop, while cheese and pepper lend even more flavor to these Buttery Garlic Cheese Bombs.
Side Dishes
Pair your bombs with a bowl of tangy marinara, classic ranch dip, or even a zippy tomato soup—each makes dipping dangerously delicious. They also play well with simple salads or alongside hearty pasta dishes for a totally comforting meal.
Creative Ways to Present
Serve them up on a big wooden platter for game day, stack them skyscraper-style on a cake stand for brunch, or nestle them together on a bread basket lined with fun patterned napkins. However you present Buttery Garlic Cheese Bombs, get ready for plenty of oohs and ahhs.
Make Ahead and Storage
Storing Leftovers
If you somehow have leftovers (they do tend to disappear fast), let the cheese bombs cool completely. Store them in an airtight container in the fridge for up to three days. The key is to keep them well sealed to maintain their softness and flavor.
Freezing
Yes, these Buttery Garlic Cheese Bombs freeze beautifully! Once baked and fully cooled, pop them onto a baking sheet to freeze individually for an hour, then transfer to a freezer bag. They’ll keep their best flavor and texture for up to one month.
Reheating
To bring back that melty magic, reheat the bombs in a 350°F (175°C) oven for 6–8 minutes, or until warmed through. You can microwave them if you’re in a rush, but for best results—and that dreamy, just-baked texture—the oven is king.
FAQs
Can I use a different type of cheese?
Absolutely! Mozzarella and cheddar are classics, but you can experiment with pepper jack, Monterey Jack, or even tiny cubes of brie or gouda for a whole new twist on these Buttery Garlic Cheese Bombs.
Is it possible to use homemade biscuit dough?
Yes! If you have a recipe for biscuit dough you love, by all means use it. The canned version just makes things extra speedy, especially when the craving for cheese bombs hits hard.
Can I prepare these ahead of time and bake later?
You can assemble the bombs, cover them tightly, and refrigerate for up to 8 hours before baking. Just remember to brush on the butter right before they go in the oven for maximum flavor.
Are Buttery Garlic Cheese Bombs vegetarian?
They sure are—just double check the cheese you’re using. Most mozzarella and cheddar are vegetarian, but it never hurts to be sure if that’s important to you.
Will the cheese leak out while baking?
It can happen, but carefully pinching and sealing the dough helps a lot. Don’t worry if a little cheese escapes—those crispy edges might just be the best part!
Final Thoughts
If you’ve never torn into Buttery Garlic Cheese Bombs before, get ready for pure happiness in snack form. There’s something so satisfying about a simple recipe that packs such explosive flavor—so treat yourself, bake up a batch, and share them (or keep them all to yourself—I won’t judge!).
Print
Buttery Garlic Cheese Bombs Recipe
- Total Time: 25 minutes
- Yield: 8 cheese bombs 1x
- Diet: Vegetarian
Description
These Buttery Garlic Cheese Bombs are a delightful treat that combines the flavors of warm, melted cheese, garlic-infused butter, and fluffy biscuit dough. Perfect for a savory snack or as a side dish for a cozy meal.
Ingredients
Biscuit Dough:
- 1 can 8-count refrigerated biscuit dough
Cheese Filling:
- 8 small cubes of mozzarella or cheddar cheese
Garlic Butter:
- 4 tablespoons unsalted butter, melted
- 2 cloves garlic, minced (or 1/2 teaspoon garlic powder)
- 1 tablespoon fresh parsley, finely chopped (optional)
Instructions
- Preheat the Oven: Preheat the oven to 375°F (190°C) and line a baking sheet with parchment paper for easy cleanup.
- Prepare the Biscuits: Open the can of biscuit dough and separate the biscuits. Flatten each one slightly with your fingers to create a small disc.
- Add the Cheese: Place one cube of cheese in the center of each biscuit. Fold the dough over the cheese and pinch the edges to seal it completely. Roll each filled biscuit into a smooth ball.
- Arrange on the Baking Sheet: Place the sealed cheese bombs seam-side down on the prepared baking sheet, leaving space between them for expansion while baking.
- Make the Garlic Butter: In a small bowl, mix the melted butter with minced garlic and parsley (if using).
- Brush with Garlic Butter: Using a pastry brush, generously brush the garlic butter mixture over each cheese bomb. Reserve a little butter to brush on after baking for an extra burst of flavor.
- Bake: Bake for 10–12 minutes or until the cheese bombs are golden brown and puffed up. You want them to be crispy on the outside and gooey inside.
- Finish and Serve: Remove the cheese bombs from the oven and brush them with the remaining garlic butter. Serve warm, and enjoy the cheesy, buttery goodness.
Notes
- For added flavor, you can sprinkle some grated Parmesan cheese over the cheese bombs before baking.
- Experiment with different types of cheese for a variety of flavors.
- Prep Time: 15 minutes
- Cook Time: 10-12 minutes
- Category: Appetizer/Side Dish
- Method: Baking
- Cuisine: American
Nutrition
- Serving Size: 1 cheese bomb
- Calories: 180
- Sugar: 2g
- Sodium: 380mg
- Fat: 12g
- Saturated Fat: 7g
- Unsaturated Fat: 4g
- Trans Fat: 0g
- Carbohydrates: 14g
- Fiber: 0g
- Protein: 5g
- Cholesterol: 30mg
Keywords: Cheese Bombs, Garlic Cheese Bombs, Biscuit Recipe, Appetizer, Side Dish
