
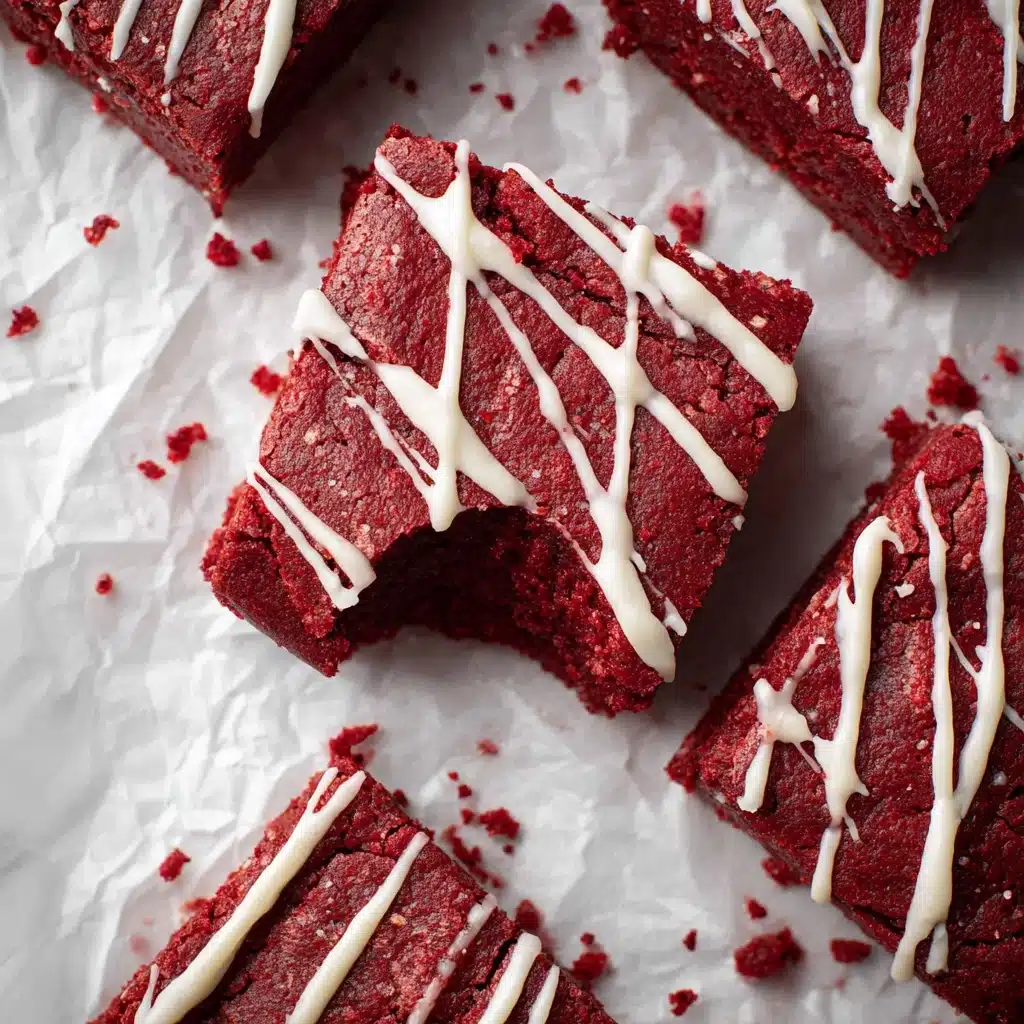
Red Velvet Brownies Recipe
Few desserts are as stunningly beautiful and irresistibly fudgy as Red Velvet Brownies. These decadent bars combine the chocolatey richness of brownies with the signature vibrant hue and subtle tang of red velvet, creating a treat that’s as perfect for holiday gatherings as it is for weeknight indulgence. If you’re ready to wow a crowd or simply treat yourself to something spectacular, look no further: Red Velvet Brownies deliver classic flavor and a showstopping look in every bite.
Ingredients You’ll Need
Ingredients You’ll Need
The magic of Red Velvet Brownies comes from a handful of pantry staples, each playing a role in the taste, texture, and signature deep color. Stick to these essentials and you’re guaranteed a pan of brownies that truly wows.
- Unsalted Butter (3/4 cup, melted): Using melted butter brings richness and that fudgy quality you want in a brownie.
- Semi-Sweet Chocolate Bar (2 oz, chopped): Real chocolate adds depth—so much better than just cocoa powder alone.
- Granulated Sugar (1 & 1/4 cups): Sweetens the brownies and also contributes to their chewy texture.
- Large Eggs (2): Essential for structure and that luxurious, dense bite.
- Vanilla Extract (2 teaspoons): Brings out the warmth and rounds off the chocolate flavor.
- White Vinegar (1 teaspoon): Traditional in red velvet desserts; it reacts with baking ingredients for that all-important tang.
- Red Gel Food Coloring (1/2 tablespoon): The secret to stunning, vibrant Red Velvet Brownies—gel holds its color beautifully when baked.
- Unsweetened Cocoa Powder (2 tablespoons): Adds chocolate richness without overpowering the iconic red color.
- All-Purpose Flour (1 & 1/4 cups): The right measurement keeps brownies dense but not dry.
- Salt (1/4 teaspoon): Just enough to balance all that sweetness and deepen the chocolate notes.
- White Chocolate Chips (1/2 cup, optional): Stir them in for pockets of creamy sweetness, or melt and drizzle over the top for a classy finish.
How to Make Red Velvet Brownies
Step 1: Preheat & Prep Your Pan
Start by preheating your oven to 350°F, which ensures a perfectly even bake. Line an 8×8-inch baking pan with parchment paper, leaving an overhang for easy lifting later—nothing’s sadder than brownies stuck to the pan!
Step 2: Melt Butter & Chocolate
In a large microwave-safe bowl, melt together the unsalted butter and chopped semi-sweet chocolate in 30-second increments, stirring well after each round. Take your time—once they’re silky smooth with zero lumps, you’ve built the foundation for ooey-gooey Red Velvet Brownies.
Step 3: Mix Sugar, Eggs & Flavorings
Add the granulated sugar to the melted chocolate mixture and stir to combine; it’ll look a bit grainy, which is totally fine. Next, crack in your eggs one at a time, beating well after each addition to get that signature shiny, crackly top. Stir in vanilla extract, white vinegar, and red gel food coloring—the batter should turn a gorgeous ruby red!
Step 4: Sift and Combine Dry Ingredients
In a separate bowl, sift together your unsweetened cocoa powder, all-purpose flour, and salt. Sifting removes lumps and helps the cocoa powder blend seamlessly, so you don’t end up with sad cocoa flecks in your brownies.
Step 5: Bring Wet & Dry Together
Gradually add your dry ingredients to the wet mixture, stirring gently to combine. Be careful not to overmix; you want everything just barely incorporated for ultimate fudginess. If you’re adding white chocolate chips, now’s the moment—fold them in gently.
Step 6: Spread Into Pan
Transfer your Red Velvet Brownie batter to the prepared pan, smoothing the top with a spatula. Try to get the corners filled for nice, even squares.
Step 7: Bake to Perfection
Bake the brownies for about 30 to 35 minutes. To test for doneness, insert a toothpick into the center; a few moist crumbs are perfect, but you don’t want any wet batter. Overbaking will rob you of that decadent chew.
Step 8: Cool Completely
Let the brownies cool in the pan—patience pays off here! Cooling sets the texture, making for easier slicing and cleaner edges.
Step 9: (Optional) Drizzle & Slice
If you want to get fancy, melt your white chocolate chips and drizzle over the cooled brownies. Let the chocolate set before slicing into squares so each bite is Instagram-worthy (and irresistible)!
How to Serve Red Velvet Brownies
Garnishes
A simple sprinkle of powdered sugar, a drizzle of melted white chocolate, or even a few ruby-red raspberries can make your Red Velvet Brownies look ultra-tempting. Don’t be afraid to pile on the goodies—these brownies love to be dressed up for the occasion!
Side Dishes
Red Velvet Brownies pair beautifully with a scoop of vanilla ice cream, fresh whipped cream, or even a dollop of tangy cream cheese frosting. For a grown-up twist, serve them alongside fresh berries and espresso—dessert doesn’t get more delightful!
Creative Ways to Present
Cut your brownies into small squares for a potluck platter, or use cookie cutters to make hearts and other fun shapes for parties and holidays. Stack them high on a tiered cake stand or box them up as edible gifts—people love to be surprised with a batch of Red Velvet Brownies!
Make Ahead and Storage
Storing Leftovers
Leftover Red Velvet Brownies keep incredibly well! Place them in an airtight container at room temperature for up to 3 days. You’ll find the texture stays moist and fudgy, making them just as irresistible on day three as they were fresh from the oven.
Freezing
Have extras or want to get ahead for a special event? These brownies are freezer-friendly! Wrap individual portions tightly in plastic wrap, then place them in a freezer bag. They’ll stay fabulous for up to 2 months—just thaw at room temperature when you’re ready for a decadent treat.
Reheating
If you like your brownies warm, pop a square in the microwave for about 10 to 15 seconds. That gentle heat softens the crumb and perks up the chocolate flavor—right back to bakery-fresh in no time.
FAQs
Can I double this Red Velvet Brownies recipe for a larger crowd?
Absolutely! Just double all ingredients and bake in a 9×13-inch pan. You might need to add a few extra minutes to the baking time, so check with a toothpick for that perfect, slightly fudgy center.
Can I use liquid red food coloring instead of gel?
Gel food coloring is preferred for Red Velvet Brownies because it delivers a stronger, more vibrant red with less liquid. If using liquid, you may need more, but keep in mind too much can affect the batter consistency.
Why do Red Velvet Brownies have vinegar in them?
White vinegar adds a gentle tang and works with the cocoa powder to enhance the classic red velvet flavor profile. It also helps activate the baking process, though in this brownie recipe it’s mostly for taste and tradition.
Can I make these brownies gluten-free?
Yes! Substitute your favorite 1:1 gluten-free flour blend for the all-purpose flour. The texture may be slightly different, but you’ll still have delicious, decadent brownies.
What’s the best way to cut brownies cleanly?
Cool your Red Velvet Brownies completely, then use a sharp knife wiped clean between slices. For extra precision, chill the brownies in the fridge first—this makes for beautifully neat edges every time.
Final Thoughts
If you’re looking for a treat that combines eye-catching beauty with pure, fudgy indulgence, you simply have to try these Red Velvet Brownies. They’re a bake-everywhere favorite for a reason—go ahead and share them (or keep them all to yourself), and don’t be surprised when you’re asked for the recipe!
Print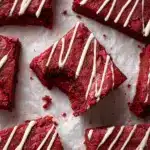
Red Velvet Brownies Recipe
- Total Time: 45-50 minutes
- Yield: 12 brownies 1x
- Diet: Vegetarian
Description
Indulge in the rich and decadent Red Velvet Brownies that are a perfect blend of chocolatey goodness and vibrant red color. These fudgy treats are easy to make and will surely satisfy your sweet cravings.
Ingredients
Brownie Batter:
- 3/4 cup unsalted butter (melted)
- 2 oz chopped semi-sweet chocolate bar
- 1 & 1/4 cup granulated sugar
- 2 large eggs
- 2 teaspoon vanilla extract
- 1 teaspoon white vinegar
- 1/2 tablespoons red gel food coloring
- 2 tablespoons unsweetened cocoa powder
- 1 & 1/4 cup all-purpose flour
- 1/4 teaspoon salt
Optional:
- 1/2 cup white chocolate chips (for mixing into the batter or for drizzling on top)
Instructions
- Preheat the oven: Preheat your oven to 350°F and line an 8×8 inch baking pan with parchment paper.
- Melt butter and chocolate: In a microwave-safe bowl, melt the butter and chopped chocolate in 30-second increments, stirring until smooth.
- Mix wet ingredients: Add sugar to the melted chocolate, then mix in eggs one at a time. Stir in vanilla extract, white vinegar, and red food coloring.
- Combine dry ingredients: In a separate bowl, sift cocoa powder, flour, and salt together.
- Combine wet and dry: Gradually add dry ingredients to the wet mixture, folding until just combined. Add white chocolate chips if desired.
- Bake: Pour batter into the pan and bake for 30-35 minutes until a toothpick comes out with moist crumbs.
- Cool and serve: Let the brownies cool in the pan, then optionally drizzle melted white chocolate on top before cutting into squares.
Notes
- You can customize these brownies by adding nuts or cream cheese frosting for extra flavor.
- Store leftover brownies in an airtight container for up to 3 days.
- Prep Time: 15 minutes
- Cook Time: 30-35 minutes
- Category: Dessert
- Method: Baking
- Cuisine: American
Nutrition
- Serving Size: 1 brownie
- Calories: 280
- Sugar: 20g
- Sodium: 110mg
- Fat: 15g
- Saturated Fat: 9g
- Unsaturated Fat: 5g
- Trans Fat: 0g
- Carbohydrates: 35g
- Fiber: 1g
- Protein: 4g
- Cholesterol: 65mg
Keywords: Red Velvet Brownies, Brownie Recipe, Chocolate Dessert
