
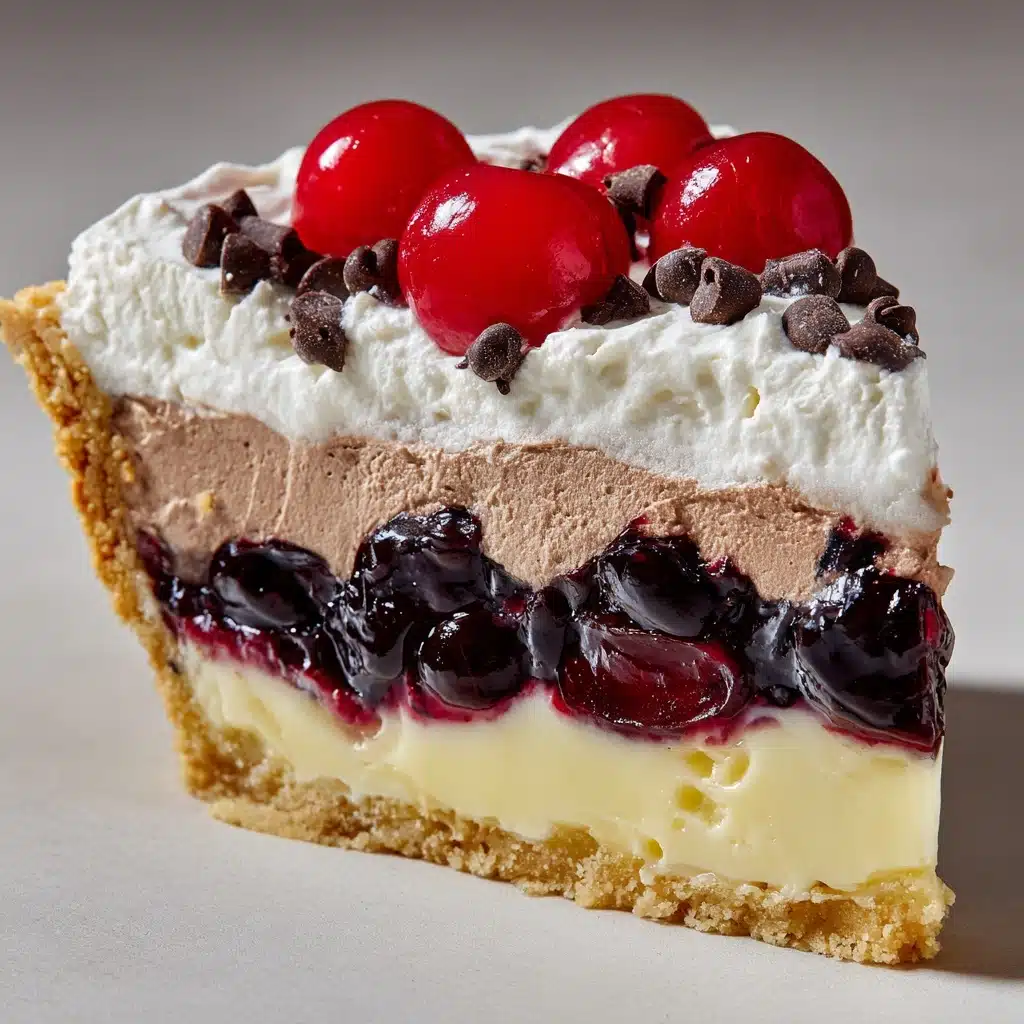
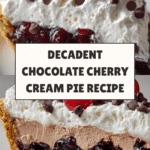
Chocolate Cherry Cream Pie Recipe
If you’re searching for a dessert that wraps together decadent chocolate, juicy cherries, and a cloud of whipped cream in a single slice, this Chocolate Cherry Cream Pie is about to make your sweet tooth rejoice. Layers of velvety chocolate, luscious cherry filling, and billowy whipped cream all nestled into a crisp pie crust: every bite is a dreamy combination of flavors and textures. Perfect for holidays, potlucks, or any moment when indulgence is the only answer, this pie is as impressive as it is effortless to make.

Ingredients You’ll Need
What I adore about this Chocolate Cherry Cream Pie is how the simple, everyday ingredients come together to make something unforgettable. Each component brings its own sparkle—richness, tartness, or creamy sweetness—so don’t skip any of them!
- Pre-baked 9-inch pie crust: Provides a crisp, buttery foundation to support the luscious layers; make sure it’s fully cooled before assembling.
- 1 can (21 oz) cherry pie filling (or homemade): Delivers tart, juicy pops of flavor and a gorgeous ruby color—homemade is lovely if you have extra time, but canned works beautifully.
- 1 box (3.9 oz) chocolate pudding mix: The shortcut secret to a rich, smooth chocolate layer that sets up perfectly every time.
- 2 cups cold milk (for pudding mix): Be sure your milk is chilly; it helps the pudding thicken to the perfect consistency.
- 1 ½ cups whipped cream (homemade or store-bought): Adds that dreamy, fluffy top layer; go homemade for extra wow, but store-bought keeps things easy.
- ½ cup chocolate chips (semi-sweet or dark): Sprinkled over the top for irresistible bites of chocolate crunch in every forkful.
- Fresh cherries for garnish (optional): These add a burst of freshness and a glamorous finish—save a few perfect ones!
How to Make Chocolate Cherry Cream Pie
Step 1: Prepare the Pie Crust
Before you begin, double-check that your pie crust is fully baked and completely cooled. This is the stage-setter for all those creamy, fruity, and chocolatey layers. Whether you’ve made your own crust or used a store-bought one, letting it cool ensures the fillings don’t melt or turn soggy, keeping that marvelous texture intact.
Step 2: Layer In the Cherry Filling
Open your can of cherry pie filling (or use your homemade batch), and spread it in an even layer over the bottom of your cooled pie crust. The cherries should cover the entire surface—it will look a bit dramatic, but that’s the magic! The tart, juicy cherries balance out the richness of the pudding and cream.
Step 3: Mix and Spread the Chocolate Pudding
Grab your pudding mix and whisk it together with cold milk, following the package directions. As the pudding thickens, you’ll see it transform into a glossy, chocolatey wonder. Gently pour or spoon it over the cherry layer, and use a spatula to smooth it evenly edge-to-edge. Try not to mix it into the cherries—it’s all about keeping those pretty layers distinct.
Step 4: Add the Whipped Cream
Spoon the whipped cream onto the pudding and carefully spread it with an offset spatula or the back of a spoon. Aim for a smooth, cloud-like top. The whipped cream provides a cool, creamy contrast to the deeper flavors below, making every bite feel light and luxurious.
Step 5: Top with Chocolate Chips and Fresh Cherries
Here’s where the fun happens! Sprinkle a generous layer of chocolate chips over the whipped cream to add texture and an extra hit of chocolate. Dot the top with fresh cherries if you have them. This simple flourish makes your Chocolate Cherry Cream Pie look ready for its closeup.
Step 6: Chill and Set
Patience pays off here—slide the assembled pie into the refrigerator and let it chill for at least two hours. This time allows all the layers to firm up just enough so you can slice perfect wedges and every flavor can meld together in harmony.
Step 7: Slice and Enjoy
When the wait is over, cut the pie with a clean, sharp knife (wiping between slices helps for neat presentation) and serve it beautifully chilled. Each slice reveals those gorgeous layers and a promise of pure delight.
How to Serve Chocolate Cherry Cream Pie
Garnishes
A little garnish can transform your Chocolate Cherry Cream Pie into something truly spectacular. Sprinkle extra chocolate chips, curls, or shavings over the whipped cream for added visual appeal and texture. Perfectly ripe fresh cherries, left with their stems on, give each slice a charming, classic finish.
Side Dishes
Keep your side dishes light and refreshing to contrast the richness of the pie. A scoop of vanilla bean ice cream, a tiny bowl of crushed pistachios, or even a sprig of mint can complement the flavors without overwhelming them. For a special touch, serve with a cup of strong coffee or a fruity iced tea.
Creative Ways to Present
For parties, try slicing the pie into small bars or bite-sized squares, and serve on a platter with festive cocktail picks. If you want to go over the top, serve each slice on a pool of warm cherry sauce or melted chocolate. You can even assemble mini Chocolate Cherry Cream Pies in mason jars—layer everything just as you would in the pie dish, and top with a cherry. It’s portable and absolutely adorable.
Make Ahead and Storage
Storing Leftovers
If you’re lucky enough to have leftovers, wrap the pie tightly with plastic wrap or store slices in airtight containers in the refrigerator. It’ll keep its flavor and texture for up to 3 days. The crust may soften a bit, but the flavors remain beautifully bold.
Freezing
You can freeze Chocolate Cherry Cream Pie, though the whipped cream texture may change slightly once thawed. For best results, freeze without the whipped cream topping. Wrap the pie or slices well in plastic and foil, and freeze for up to 2 months. Add fresh whipped cream and garnishes after thawing for the best look and taste.
Reheating
This pie is meant to be enjoyed chilled, so there’s no need to reheat. If you’ve frozen it, thaw overnight in the fridge, then slice and serve as usual. Avoid microwaving to keep those layers looking and tasting their best.
FAQs
Can I use homemade cherry pie filling?
Absolutely! If you have a favorite homemade cherry filling (especially with fresh or frozen cherries), it will only make your Chocolate Cherry Cream Pie even more special and flavorful. Just let it cool before layering into the crust.
Can I make this pie gluten-free?
Yes, simply swap in a gluten-free pie crust and check that your pudding mix is certified gluten-free. The rest of the ingredients generally fit most gluten-free diets, making it easy to adjust for special dietary needs.
How far in advance can I assemble Chocolate Cherry Cream Pie?
This pie actually tastes better with some chill time, so making it a day ahead is perfect. Assemble everything except the final whipped cream and garnishes, then add those right before serving for the freshest flavor and best presentation.
What if I don’t have whipped cream?
No worries! If you’re out of whipped cream, you can try a store-bought whipped topping, or quickly whip up your own with heavy cream and a spoonful of powdered sugar. The pie still tastes wonderful even if you keep the topping light.
Can I substitute other fruits for cherries?
Sure! While cherries are the star of this Chocolate Cherry Cream Pie, you can experiment with blueberries, raspberries, or even blackberries for a twist. Just make sure the fruit filling isn’t too runny—consistency is key for those pretty slices.
Final Thoughts
I can’t encourage you enough to give this Chocolate Cherry Cream Pie a try—it’s easy enough for weeknights and impressive enough for celebrations. Every layer is pure joy, and each bite reminds you that dessert doesn’t have to be complicated to be memorable. Share it with those you love (or just treat yourself to a second slice!), and watch this pie disappear in a flash.
Print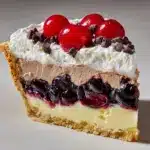
Chocolate Cherry Cream Pie Recipe
- Total Time: 2 hours 20 minutes
- Yield: 1 9-inch pie (8 servings) 1x
- Diet: Vegetarian
Description
Indulge in the decadent combination of rich chocolate and sweet cherries with this delightful Chocolate Cherry Cream Pie recipe. A luscious treat that’s perfect for any occasion!
Ingredients
For the Pie:
- 1 pre-baked 9-inch pie crust
- 1 can (21 oz) cherry pie filling (or homemade)
- 1 box (3.9 oz) chocolate pudding mix
- 2 cups cold milk (for pudding mix)
- 1 ½ cups whipped cream (homemade or store-bought)
- ½ cup chocolate chips (semi-sweet or dark)
- Fresh cherries for garnish (optional)
Instructions
- Ensure the pie crust is pre-baked and fully cooled before assembling. Spread the cherry pie filling evenly across the bottom of the crust.
- Prepare the chocolate pudding according to the package instructions using cold milk. Let it thicken slightly, then spread it over the cherry layer.
- Gently spread whipped cream over the chocolate layer, creating a smooth, even topping.
- Sprinkle chocolate chips over the whipped cream, and add fresh cherries for extra flavor and presentation.
- Chill the pie in the refrigerator for at least 2 hours to allow the layers to set.
- Slice and serve chilled for a rich and creamy chocolate-cherry treat!
- Prep Time: 20 minutes
- Category: Dessert
- Method: Baking, Chilling
- Cuisine: American
Nutrition
- Serving Size: 1 slice
- Calories: 320
- Sugar: 22g
- Sodium: 260mg
- Fat: 15g
- Saturated Fat: 8g
- Unsaturated Fat: 6g
- Trans Fat: 0g
- Carbohydrates: 42g
- Fiber: 2g
- Protein: 4g
- Cholesterol: 15mg
Keywords: Chocolate Cherry Cream Pie, Dessert, Chocolate, Cherries, Pie
