
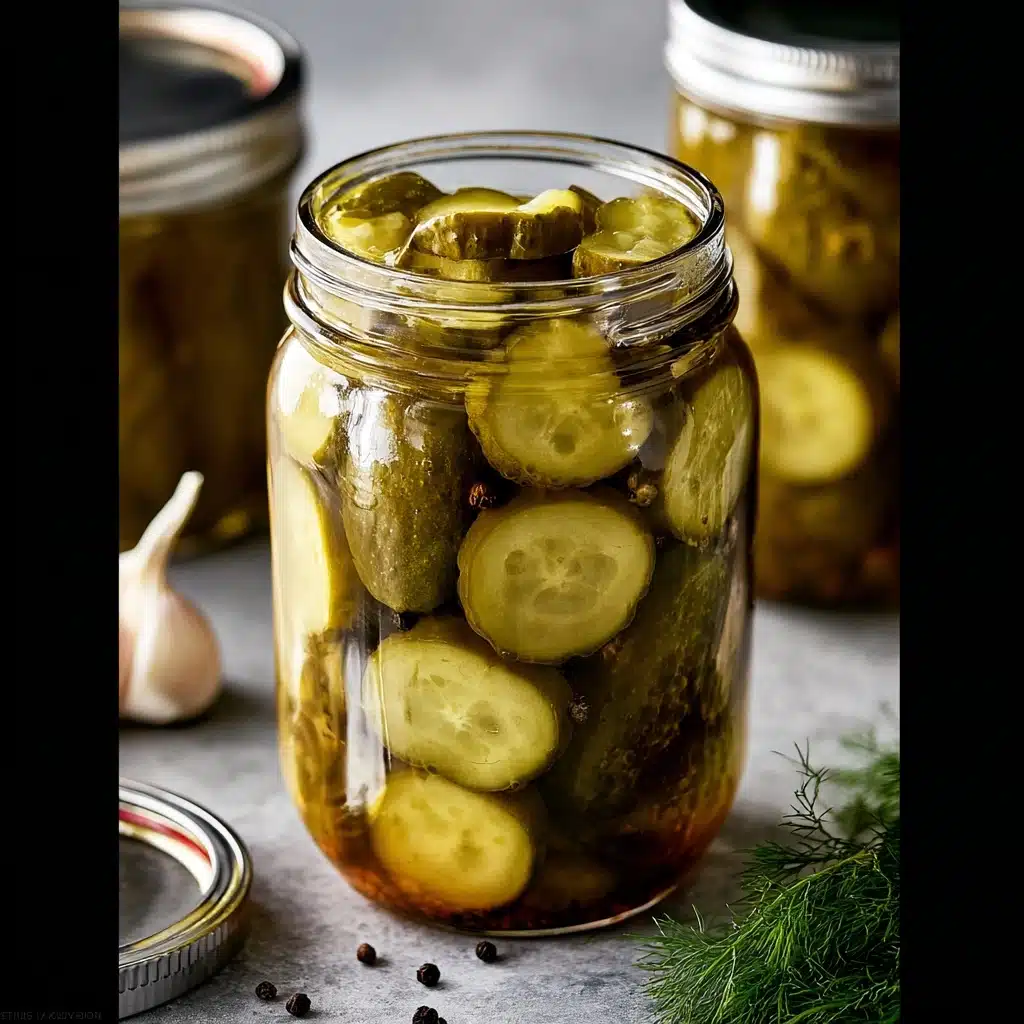
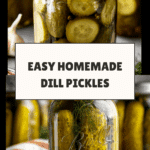
Easy Homemade Dill Pickles Recipe
Get ready to transform your kitchen with the irresistible crunch and briny brightness of Easy Homemade Dill Pickles. This beloved recipe marries garden-fresh cucumbers, fragrant dill, and zingy garlic in a beautifully balanced vinegar brine, capturing summer in a jar. Whether you’re a pickling pro or a curious kitchen adventurer, these pickles promise unbeatable flavor and vibrant color, perfect for snacking straight from the fridge or elevating your favorite dishes with a tangy, refreshing bite. Plus, you’ll love how simple and satisfying the whole process feels from your very first jar—homemade really does taste a million times better!
Ingredients You’ll Need
Let’s start with the magic of the basics! These ingredients are straightforward, but each one plays a special role in crafting the addictive flavor, impressive crunch, and signature green hue of Easy Homemade Dill Pickles.
- Cucumbers: Choose fresh and firm cucumbers; their crisp texture makes all the difference in every bite.
- Peppercorns: Just a handful in each jar adds a subtle spice and awesome depth.
- Garlic Cloves: Tuck in a few whole cloves for sharpness and aromatic punch.
- Fresh Dill: The hero behind that classic pickle flavor and lovely aroma; don’t skimp!
- Water: Forms the main body of your brine—make sure it’s clean and cool.
- Distilled White Vinegar: This provides that tangy kick and acts as a natural preservative.
- Fine Salt: Helps draw out moisture and keeps those pickles nice and crisp.
- Granulated Sugar: Just a touch rounds out the acidity and ties the flavors together.
- Bay Leaves: A classic pickling spice, bay leaves bring an earthy background note to the brine.
How to Make Easy Homemade Dill Pickles
Step 1: Sterilize the Jars
Take a little extra care at the very beginning by cleaning your jars and lids with warm, soapy water. Sterilize the lids by boiling them for a few minutes, and pop the cleaned jars upside down in a 215°F preheated oven for about 20 minutes. This keeps everything super sanitary, ensuring your Easy Homemade Dill Pickles stay fresh and delicious for months.
Step 2: Make the Pickling Brine
Grab a large pot and combine the water, white vinegar, fine salt, sugar, and bay leaves. Bring everything to a steady boil then let it simmer for 5 minutes. This allows the flavors to meld and the salt and sugar to dissolve completely. After taking the pot off the heat, remove the bay leaves and let the brine cool for 10 minutes—perfect timing for prepping your jars!
Step 3: Fill the Jars
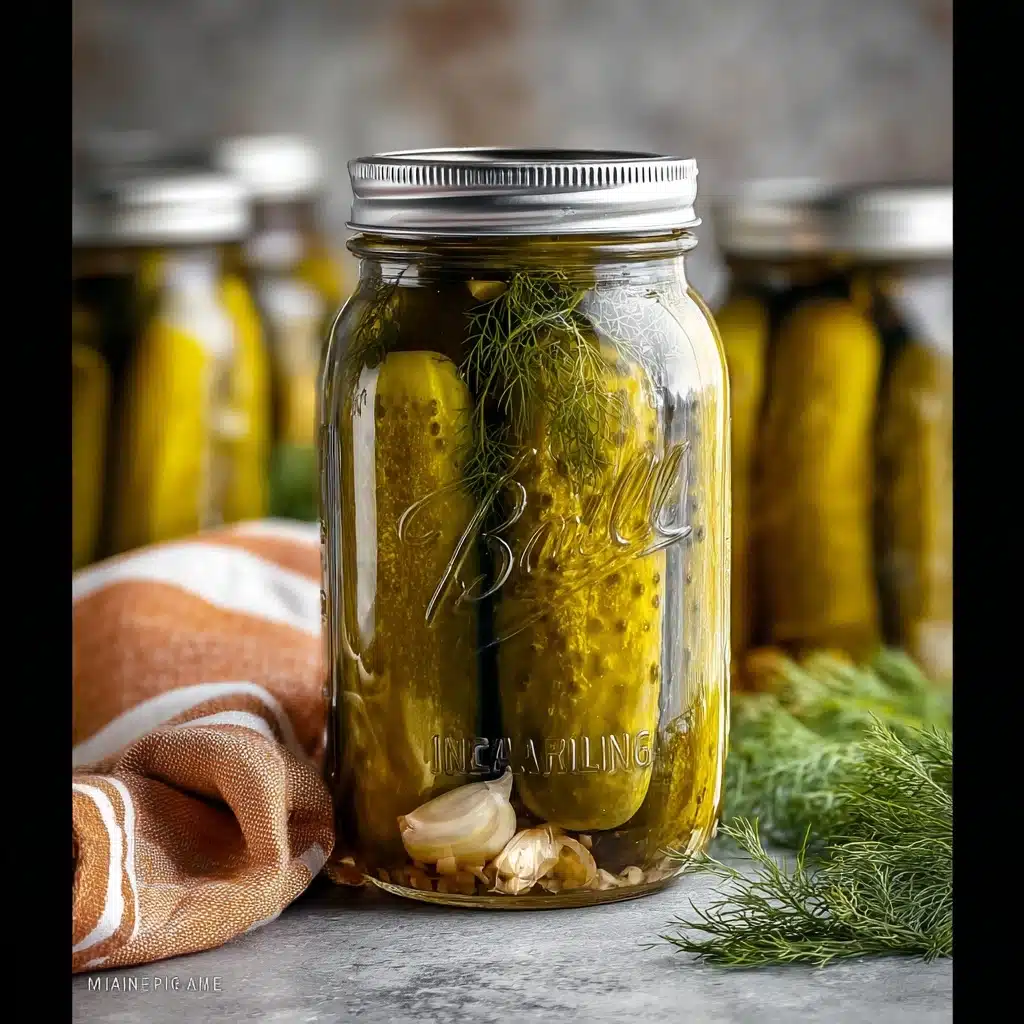
Trim the ends off your cucumbers and get ready to pack plenty of flavor into each jar. Line the bottom with sprigs of dill, peppercorns, and garlic, then pack in your cucumbers as snugly as possible. Pour the slightly cooled brine in, filling up to about a half-inch from the top. Don’t worry if things look crowded—tight packing leads to crunchier pickles!
Step 4: Process the Jars
Before you start, line your canning pot with a towel or rack so the jars don’t touch the bottom directly. Arrange your filled jars in the pot, add warm water until it comes about two inches below the jar rims, and bring to a boil. Once boiling, reduce to a gentle simmer and process the jars for about 15 minutes, or until the cucumbers turn an inviting light green color.
Step 5: Seal and Store
Want to hear the most satisfying part? Using a jar lifter, carefully remove your jars and tightly secure the lids. Flip them upside down right away and nestle them under thick bath towels for 12 to 24 hours. That magical pop sound means your Easy Homemade Dill Pickles are sealed and ready for storage. Stash them in a cool spot and let the flavors develop even further for a few days, if you can wait!
How to Serve Easy Homemade Dill Pickles
Garnishes
A sprig of fresh dill or a sprinkling of cracked pepper adds an instant chef’s touch. You can even toss in extra whole garlic cloves or thin slices of red onion for color and aromatic flair—these details really make your Easy Homemade Dill Pickles stand out on any table.
Side Dishes
These pickles absolutely shine beside classic deli sandwiches, juicy burgers, or barbecue favorites. Their tart crunch is the ideal partner for rich meats, creamy potato salads, or smoky grilled veggies. You’ll find yourself reaching for a pickle spear with just about everything!
Creative Ways to Present
For your next picnic or party, try slicing the pickles into chips for topping sliders, or dice them into your homemade relish. Stack them on charcuterie boards or skewer them with cheese and olives for a zesty nibble. Easy Homemade Dill Pickles are endlessly adaptable and always grab attention.
Make Ahead and Storage
Storing Leftovers
Once sealed and cooled, store unopened jars in a cool, dark pantry for up to a year. Once opened, keep jars in the refrigerator—your Easy Homemade Dill Pickles will stay crisp and tangy for several weeks, as long as everything is covered by brine and you always use a clean fork to remove them.
Freezing
Pickles really aren’t freezer friends—the texture changes and the crunch takes a dive. Instead, rely on proper canning and refrigeration to keep those Easy Homemade Dill Pickles tasting garden-fresh and perfectly snappy.
Reheating
Pickles are happiest cold or at room temperature, so just grab a chilled spear straight from the fridge—no reheating necessary! If adding them to cooked dishes, tuck them in at the end to preserve their texture and punchy flavor.
FAQs
How long should I let the pickles sit before opening?
For best flavor and crunch, let your Easy Homemade Dill Pickles rest for at least 5 to 7 days after sealing, although if you sneak one earlier it will still be tasty!
Can I use other types of vinegar?
Yes, but stick with vinegar at 5 or 6 percent acidity. Apple cider vinegar will add sweetness and a golden hue, while white wine vinegar is slightly milder. Try a small batch if you want to experiment before committing.
How do I keep my pickles extra crunchy?
Very fresh cucumbers are key, and trimming both ends also helps. Don’t overprocess the jars, and try adding a grape leaf or black tea bag to each jar for their natural tannins, which can help preserve crunch.
Can I reduce the sugar in the recipe?
You can! The sugar helps balance the vinegar, but you can adjust the amount slightly to taste. Just keep the salt and vinegar ratio the same for safe pickling.
Do I have to process the jars if I’m eating them right away?
If you prefer refrigerator pickles, skip the water bath; just pour warm brine over cucumbers in sterile jars and refrigerate. They’ll last a few weeks, but processing the jars is best for long-term pantry storage.
Final Thoughts
If you love that satisfying crunch and briny zing, you’ll absolutely adore making these Easy Homemade Dill Pickles in your own kitchen. There’s nothing quite like the flavor of homemade—plus, it’s truly rewarding to open a jar you crafted yourself. Give this simple method a try and watch your family reach for seconds every time!
Print
Easy Homemade Dill Pickles Recipe
- Total Time: 24 hours
- Yield: Varies
- Diet: Vegetarian
Description
These Easy Homemade Dill Pickles are crunchy, tangy, and perfectly seasoned. Enjoy the satisfaction of making your own pickles with this simple recipe.
Ingredients
Cucumbers:
12 pounds cucumbers, well rinsed with ends trimmed
Peppercorns:
1/2 tablespoon per jar
Garlic Cloves:
16 cloves (2 per jar)
Fresh Dill:
2-3 twigs per jar
Water:
12 cups (3,000 ml)
White Vinegar:
2 cups (500 ml, 5% or 6% acidity)
Salt:
2/3 cup (200g)
Sugar:
1/2 cup + 1 tablespoon (115g)
Bay Leaves:
5 leaves
Instructions
- Sterilize Jars: Wash all jars and lids with warm soapy water. Sterilize lids in boiling water for 4-5 minutes. Dry jars in a 215°F oven for 20 minutes.
- Make Pickling Brine: Combine water, vinegar, sugar, salt, and bay leaves in a pot. Boil, then let it rest and remove bay leaves.
- Fill Jars: Add dill, garlic, and peppercorns to jars. Pack cucumbers tightly and pour brine over them.
- Process the Jars: Place jars in a pot with water. Boil for 15 minutes until cucumbers turn light green.
- Seal the Jars: Close lids, flip jars, cover with towels, and let them sit for 12-24 hours.
Notes
- Ensure jars do not touch the pot directly during processing.
- Listen for the pop sound indicating a sealed jar.
- Prep Time: 30 minutes
- Cook Time: 20 minutes
- Category: Pickling
- Method: Boiling, Canning
- Cuisine: American
Nutrition
- Serving Size: 1 pickle (average size)
- Calories: 15
- Sugar: 1g
- Sodium: 320mg
- Fat: 0g
- Saturated Fat: 0g
- Unsaturated Fat: 0g
- Trans Fat: 0g
- Carbohydrates: 3g
- Fiber: 1g
- Protein: 1g
- Cholesterol: 0mg
Keywords: Homemade Dill Pickles, Pickling, Canning, Preserving, Easy Pickles