
Gluten Free Red Velvet Cake Protein Bars Recipe
Introduction
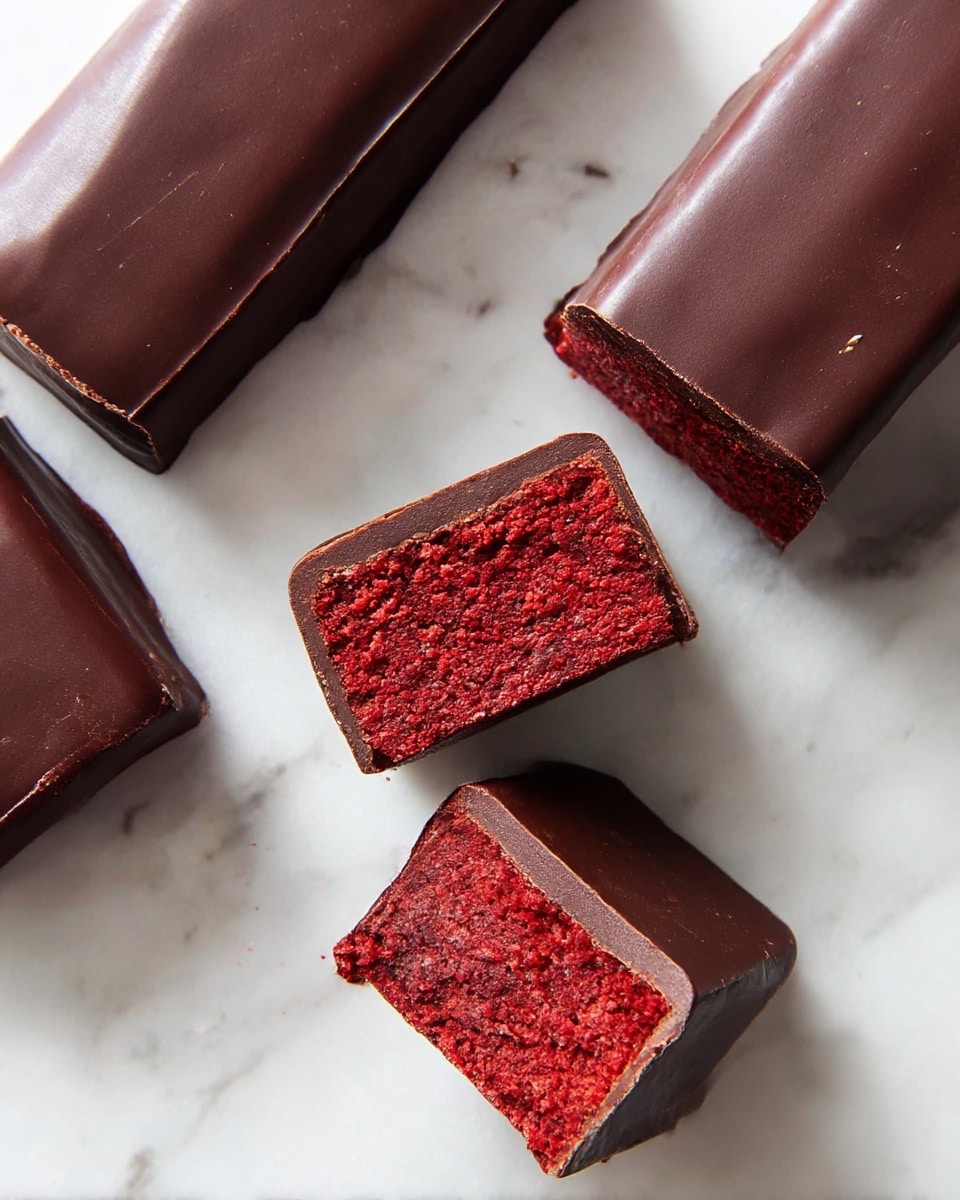
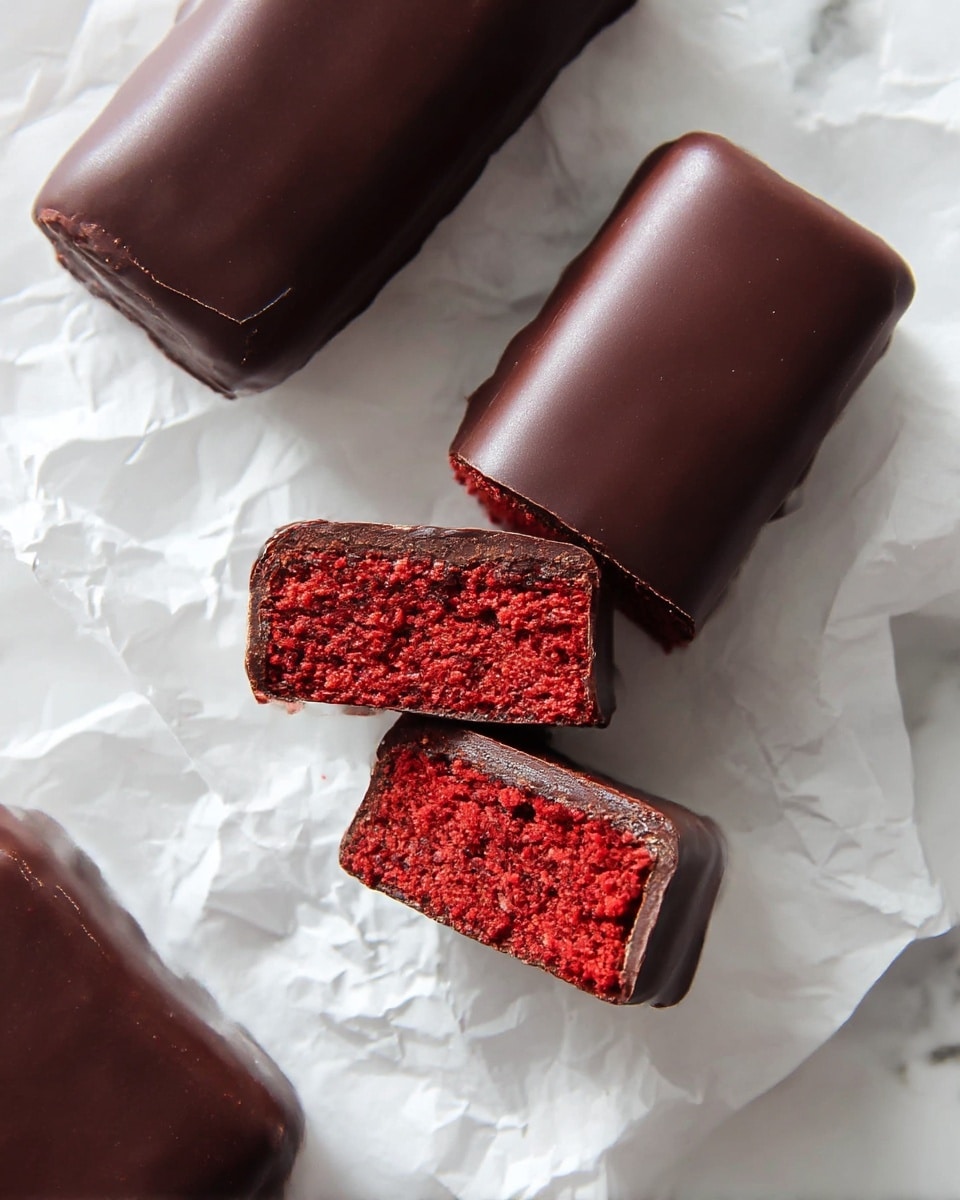
These Gluten Free Red Velvet Cake Protein Bars combine rich cocoa flavor with a boost of protein, making them a delicious and nutritious snack. They’re perfect for satisfying your sweet tooth while fueling your day.
Ingredients
- 1 cup vanilla protein powder (see notes for more info*)
- 1/2 cup coconut flour
- 3 Tbsp cocoa powder (use dark cocoa powder for deeper color)
- 1/4 cup monk fruit sweetener (or any granulated sugar of choice**)
- 4 oz low fat cream cheese (softened to room temperature, see notes on using vegan cream cheese***)
- 2 tsp no-taste red coloring gel (16g)
- 1/3 cup plus 1 Tbsp unsweetened almond milk (or other dairy-free milk like cashew or coconut milk)
- 1/2 cup white chocolate chips
Instructions
- Step 1: In a clean bowl, mix the dry ingredients: protein powder, coconut flour, cocoa powder, and sugar of choice.
- Step 2: Add the softened cream cheese and red food coloring gel, then use your hands to incorporate them thoroughly into the dry ingredients.
- Step 3: Add the almond milk and knead with your hands until the dough combines. If too soft, add more coconut flour; if too thick, add a teaspoon or more of milk or water. The dough should be firm but soft enough to roll into a ball without crumbling.
- Step 4: Shape the dough into a rectangular mound. Wrap it tightly in plastic wrap or place in an airtight container, then freeze for at least 30 minutes to set.
- Step 5: Remove from the freezer and cut the dough into 7 bars using a sharp knife. Keep the bars frozen until ready for the next step.
- Step 6: Melt the white chocolate chips in the microwave in 20-second bursts, stirring between each interval until smooth. (Optional: mix in 2 tsp coconut or olive oil for a thinner coating.)
- Step 7: Dip each protein bar into the melted chocolate, then place them on clean parchment paper.
- Step 8: Allow the chocolate to set completely before serving. Enjoy your homemade gluten-free red velvet protein bars!
Tips & Variations
- Use dark cocoa powder for a richer red velvet color and flavor.
- For a vegan option, substitute the cream cheese with a vegan cream cheese alternative.
- If the dough feels too sticky, chill it longer or add a bit more coconut flour for easier handling.
- Experiment with different dairy-free milks like cashew or coconut for subtle flavor changes.
- Mix a small amount of coconut oil into the melted chocolate for a smoother coating that hardens nicely.
Storage
Store the protein bars in an airtight container in the freezer for up to 2 weeks. Thaw slightly at room temperature before eating for best texture. Avoid storing at room temperature as they may soften and lose shape.
How to Serve
Serve this delicious recipe with your favorite sides.
FAQs
Can I use a different protein powder for this recipe?
Yes, you can use any vanilla-flavored protein powder you prefer, but be aware that some protein powders absorb liquid differently, which may affect dough consistency.
Is it possible to make these bars without cream cheese?
The cream cheese adds moisture and creaminess to the bars. If you want to skip it, try a vegan cream cheese alternative or add a bit more dairy-free milk to maintain the right dough texture.
Print
Gluten Free Red Velvet Cake Protein Bars Recipe
- Total Time: 55 minutes
- Yield: 7 protein bars 1x
- Diet: Gluten Free
Description
These Gluten Free Red Velvet Cake Protein Bars are a delicious and nutritious snack designed to satisfy your sweet tooth while providing a good protein boost. Made with vanilla protein powder, coconut flour, and cream cheese, they mimic the rich, indulgent flavors of red velvet cake. Coated with white chocolate, these bars are perfect for a quick energy fix or post-workout snack, all while being gluten-free and adaptable to vegan diets.
Ingredients
Dry Ingredients
- 1 cup vanilla protein powder (see notes for more info)
- 1/2 cup coconut flour
- 3 Tbsp dark cocoa powder
- 1/4 cup monk fruit sweetener (or any granulated sugar of choice)
Wet Ingredients
- 4 oz low fat cream cheese, softened to room temperature (see notes on using vegan cream cheese)
- 2 tsp no-taste red coloring gel (16g)
- 1/3 cup plus 1 Tbsp unsweetened almond milk (or other dairy free milk like cashew or coconut milk)
Topping
- 1/2 cup white chocolate chips
Instructions
- Mix Dry Ingredients: In a clean bowl, combine the vanilla protein powder, coconut flour, dark cocoa powder, and monk fruit sweetener, ensuring they are well mixed.
- Add Wet Ingredients: Incorporate the softened cream cheese and red food coloring gel into the dry mixture using your hands. Knead until they are evenly distributed throughout the mixture.
- Form the Dough: Gradually add the almond milk while continuing to knead the dough with your hands. Adjust the consistency by adding more coconut flour if the dough is too soft or more liquid if it’s too thick. The dough should be firm yet soft enough to roll into a ball without crumbling.
- Shape and Chill: Shape the dough into a rectangular mound, wrap tightly in plastic wrap or place in an airtight container, and freeze for at least 30 minutes to let it set properly.
- Cut Into Bars: Using a sharp knife, cut the set dough into 7 even-sized bars. Keep the bars frozen until ready for the chocolate coating.
- Melt Chocolate: Melt the white chocolate chips in the microwave in 20-second intervals, stirring in between until fully melted. For a thinner chocolate shell, optionally stir in 2 teaspoons of coconut oil or olive oil after melting.
- Coat Bars: Dip each protein bar into the melted white chocolate, coating them completely. Place the coated bars on parchment paper to set.
- Set and Serve: Allow the chocolate to harden completely before serving. Enjoy the bars cold for best texture and taste!
Notes
- Use vanilla protein powder that suits your dietary needs or preferences for the best flavor and texture.
- For a vegan version, replace low fat cream cheese with a vegan cream cheese alternative.
- You can substitute monk fruit sweetener with any granulated sweetener like erythritol or regular sugar depending on your preference.
- Adjust the dough consistency carefully to ensure the bars hold together but remain moist and tender.
- The chocolate coating is optional but adds a delicious finishing touch that enhances the flavor profile.
- Keep the bars refrigerated or frozen for longer shelf life and best texture.
- Prep Time: 15 minutes
- Cook Time: 10 minutes
- Category: No-Cook
- Method: No-Cook
- Cuisine: American
Keywords: red velvet protein bars, gluten free protein bars, healthy snacks, high protein snacks, no bake protein bars, keto friendly, low carb sweets

