
homemade Refrigerator Pickled Vegetables Recipe
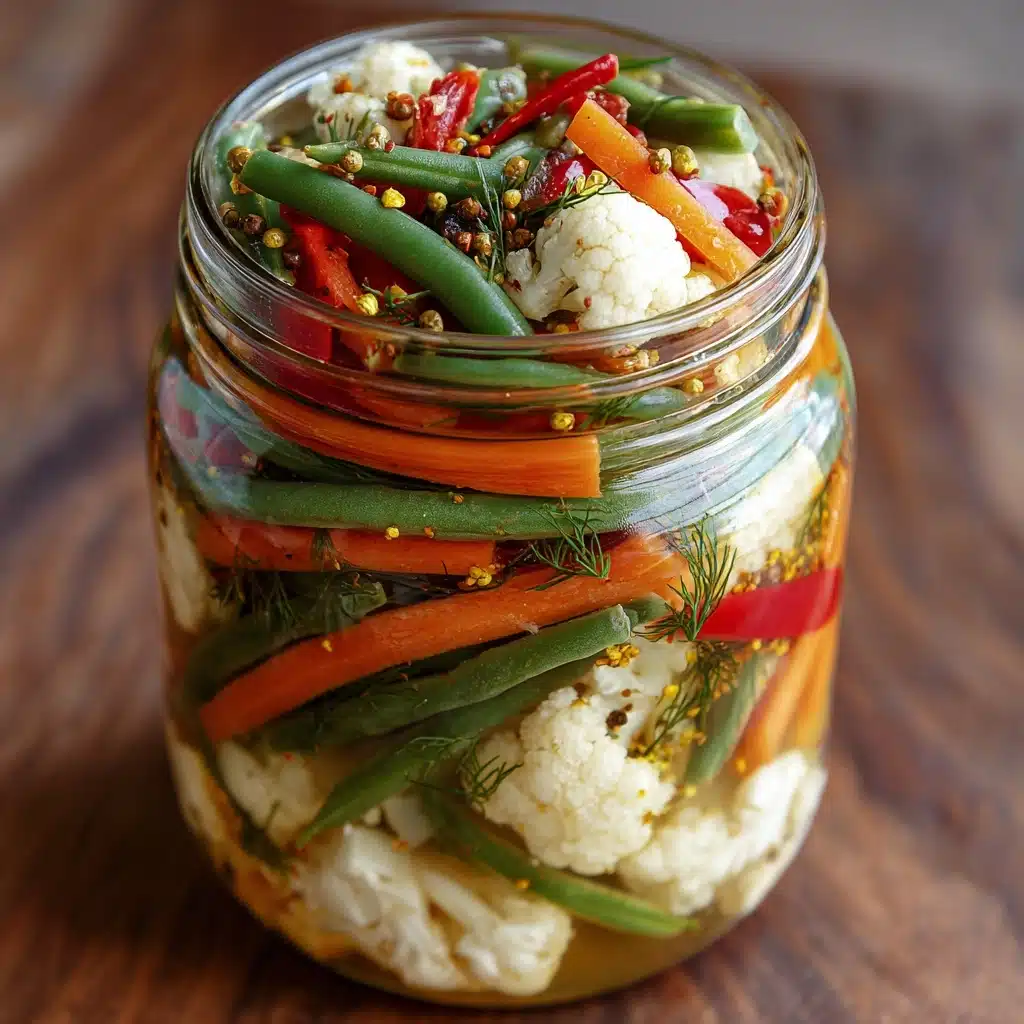
If you’re searching for a delicious way to brighten up any meal, look no further than homemade Refrigerator Pickled Vegetables. This easy, colorful medley is the ultimate fridge staple—crunchy veggies transformed with a tangy, zesty brine that’s totally customizable. With a quick prep and a short pickling time, you’ll have snappy, vibrant veggies on hand for snacking, sandwiches, salads, and beyond. Trust me: once you taste the crisp, flavor-packed results, you’ll want to keep a jar in your fridge at all times.
Ingredients You’ll Need
Every ingredient in this homemade Refrigerator Pickled Vegetables recipe serves a vital purpose, building bold layers of flavor and bringing heaps of crunch and color. Let’s see what each one brings to the table—and how you can make them your own.
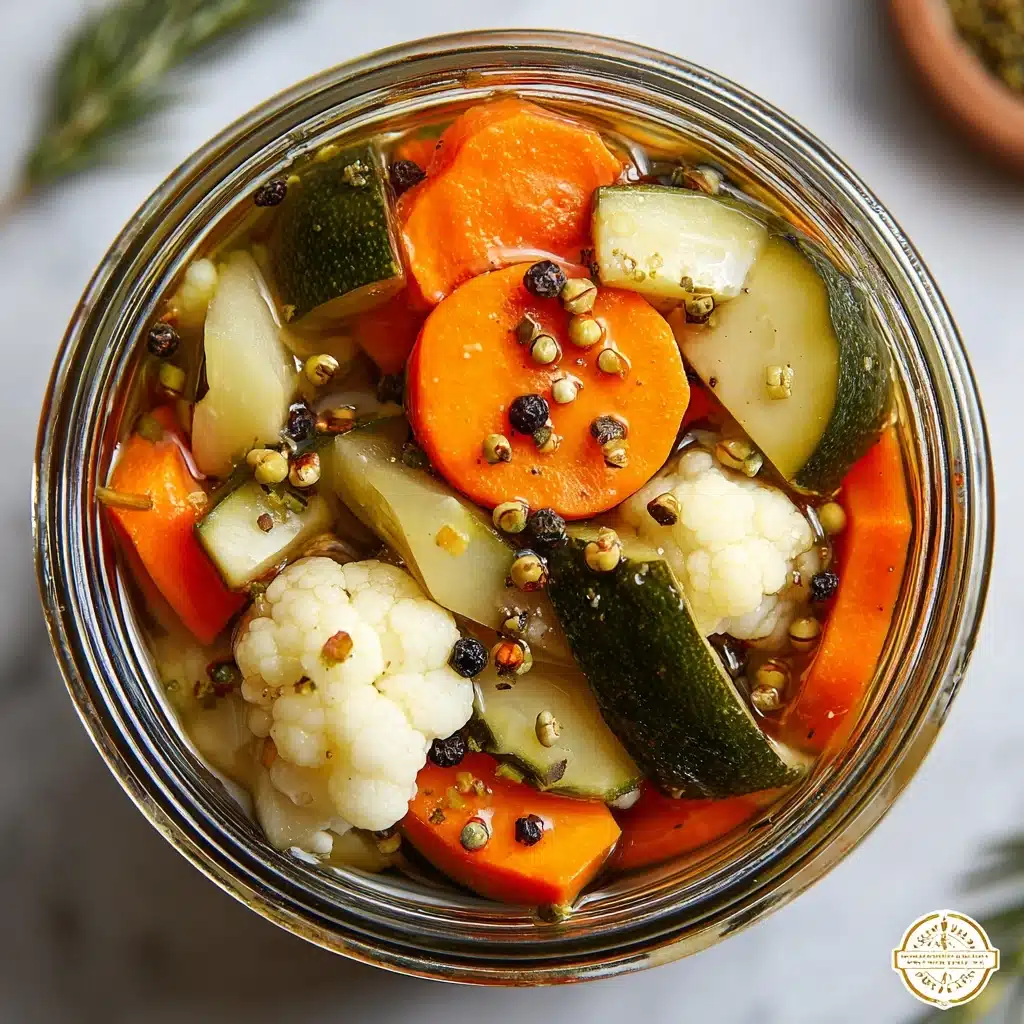
- Cauliflower florets: Their sturdy texture soaks up all the tangy goodness and adds a hearty bite.
- Sliced carrots: Sweet and crunchy, carrots bring cheerful color and natural sweetness.
- Sliced cucumbers: The ultimate pickling veggie, cucumbers turn extra crisp and refreshing.
- Red bell pepper strips: Bright and mild, red peppers offer pops of sweetness and color to the mix.
- Green beans, trimmed: These beans keep their satisfying snap when pickled, adding variety in texture.
- Garlic, minced: Earthy and aromatic, garlic deepens the savoriness of the brine.
- White vinegar: The essential tang, white vinegar preserves the veggies and sharpens the flavors.
- Water: Balances out the sharp vinegar so the flavors don’t overpower.
- Salt: Key for flavor and for drawing out moisture from the vegetables.
- Sugar: Just a hint to mellow the acidity and bring out the natural flavors.
- Mustard seeds: These infuse the brine with subtle heat and a lovely, classic pickled taste.
- Black peppercorns: Add little bursts of peppery warmth to every bite.
- Red pepper flakes (optional): For anyone who enjoys a little kick, this optional add-in brings heat.
How to Make homemade Refrigerator Pickled Vegetables
Step 1: Prep the Vegetables
Start by gathering all your fresh vegetables—cauliflower, carrots, cucumbers, red bell pepper, and green beans. Wash them thoroughly and chop or slice them as indicated. Not only does prepping everything first save you time later, but it also ensures every veggie will soak up that amazing pickling brine evenly. Toss them all together in a large bowl and get ready for the magic to begin!
Step 2: Mix the Brine
In a medium saucepan, combine the white vinegar, water, salt, sugar, mustard seeds, black peppercorns, and red pepper flakes if you love heat. Bring the mixture to a boil over medium-high heat, stirring occasionally. The salt and sugar need to fully dissolve—this step infuses the brine with all the aromatic, tangy flavors that make homemade Refrigerator Pickled Vegetables so irresistible.
Step 3: Pour Hot Brine Over the Vegetables
Once your brine is bubbling and translucent, carefully pour it over the bowl of prepared vegetables. The heat from the brine helps the flavors permeate deeply and locks in vibrant colors. Make sure every veggie is fully submerged; if needed, gently press them down with a spoon. Let the mixture cool to room temperature as the brine works its transformative magic.
Step 4: Pack the Vegetables into Jars
After the veggies and brine have cooled, it’s time to transfer everything to clean jars or airtight containers. Pack the veggies in snugly, then pour in the brine to completely cover them. This step is key for freshness and flavor: submerging the veggies ensures every bite is perfectly pickled.
Step 5: Refrigerate and Wait
Seal the jars tightly and pop them into the fridge. Now, patience is your ally! Letting them chill for at least 24 hours lets the flavors develop and intensify. The longer they sit, the better they get. Your homemade Refrigerator Pickled Vegetables will keep their crunch and zing for up to a month—if they last that long!
How to Serve homemade Refrigerator Pickled Vegetables
Garnishes
Top your pickled vegetables with a sprinkle of chopped fresh dill, a dusting of cracked pepper, or even a few extra mustard seeds for visual flair and flavor. A spritz of lemon zest over the veggies can brighten the plate and add an irresistible aroma. Think about adding microgreens for a pretty finish when serving to guests.
Side Dishes
These homemade Refrigerator Pickled Vegetables are the ultimate sidekick for burgers, sandwiches, and charcuterie boards. Layer them onto grain bowls or next to grilled proteins for a punch of flavor and texture. I also love serving them alongside hummus or creamy dips—the tangy crunch is a perfect contrast.
Creative Ways to Present
Showcase your vibrant pickles piled in a rustic mason jar with a spoon for easy snacking. Or, thread a colorful combination onto cocktail skewers for a playful appetizer. Scatter them over salads or tacos for pops of flavor and color, or chop finely and mix into potato or egg salads for something unexpectedly delicious. Homemade Refrigerator Pickled Vegetables bring a fresh twist wherever they appear.
Make Ahead and Storage
Storing Leftovers
Keep your homemade Refrigerator Pickled Vegetables in tightly sealed jars or containers in the refrigerator. The beauty of this recipe is its make-ahead convenience—the flavors only improve over time! Just ensure the veggies are always submerged in brine to maintain their crispness and tang.
Freezing
Freezing is not recommended, as it can cause your beautifully crunchy veggies to become mushy. The texture of pickled vegetables is best preserved with just refrigeration—freezer temps tend to ruin that perfect snap we love in a fresh pickle.
Reheating
Pickled vegetables are best enjoyed chilled or at room temperature, straight from the fridge. Reheating will diminish their crunch and could mellow the bright flavors, so simply drain and serve whenever you’re ready to snack or pair them with a meal.
FAQs
Can I swap the vegetables for others I have on hand?
Absolutely! This recipe is endlessly adaptable—try adding radishes, asparagus, onions, or even thinly sliced fennel. Just keep the size of the veggies similar for consistent pickling.
How long can I keep homemade Refrigerator Pickled Vegetables in the fridge?
Stored properly in an airtight jar, your pickled vegetables will stay fresh and flavorful for up to one month. Always check for any off-smells or changes in texture before enjoying.
Do I need any special canning equipment?
Nope! One of the joys of this recipe is that you don’t need any water bath or canning gear—just clean jars or containers with tight lids. It’s truly a hassle-free way to enjoy homemade pickles.
Can I adjust the sweetness or spiciness?
Totally! Feel free to play with the amount of sugar for more or less sweetness, and add or omit red pepper flakes to suit your heat tolerance. Taste the brine and adjust before pouring it over the veggies.
What should I do if my vegetables aren’t fully covered by brine?
If needed, mix up a little extra brine (using the same vinegar and water ratio with salt and sugar) to fully submerge your veggies in the jars. Keeping them covered is essential for great pickling and preventing spoilage.
Final Thoughts
There’s something incredibly satisfying about opening your fridge and finding a jar of homemade Refrigerator Pickled Vegetables, ready to enjoy. They’re fresh, tangy, and addictive—the perfect way to add zing to any dish. I hope you give these a try and make them your own favorite kitchen staple!
Print
homemade Refrigerator Pickled Vegetables Recipe
- Total Time: 24 hours 20 minutes
- Yield: Approximately 6 cups of pickled vegetables 1x
- Diet: Vegetarian
Description
This recipe for homemade Refrigerator Pickled Vegetables is a simple and delicious way to preserve your favorite veggies. Tangy and crisp, these pickled vegetables are perfect for adding a zesty kick to sandwiches, salads, or enjoying as a flavorful side dish.
Ingredients
Cauliflower Pickles:
- 2 cups cauliflower florets
Carrot Pickles:
- 1 cup sliced carrots
Cucumber Pickles:
- 1 cup sliced cucumbers
Pepper Pickles:
- 1 red bell pepper, sliced into strips
Green Bean Pickles:
- 1 cup green beans, trimmed
Pickling Liquid:
- 3 cloves garlic, minced
- 2 cups white vinegar
- 2 cups water
- 2 tablespoons salt
- 1 tablespoon sugar
- 2 teaspoons mustard seeds
- 1 teaspoon black peppercorns
- ½ teaspoon red pepper flakes (optional, for heat)
Instructions
- Prepare Vegetables: In a large bowl, combine the cauliflower, carrots, cucumbers, red bell pepper, and green beans.
- Make Pickling Liquid: In a medium saucepan, bring the vinegar, water, salt, sugar, mustard seeds, peppercorns, and red pepper flakes to a boil. Stir until the salt and sugar dissolve.
- Pickle Vegetables: Pour the hot pickling liquid over the vegetables, ensuring they are fully submerged. Let cool to room temperature.
- Transfer to Jars: Once cooled, transfer vegetables and liquid to clean jars or containers, ensuring vegetables are covered in liquid. Seal tightly.
- Refrigerate: Refrigerate for at least 24 hours before serving. Flavor will intensify over time. Enjoy for up to 1 month.
Notes
- You can customize the pickling spices to suit your taste preferences.
- Experiment with different vegetables like onions, radishes, or jalapenos for variety.
- These pickled vegetables make great homemade gifts!
- Prep Time: 15 minutes
- Cook Time: 5 minutes
- Category: Appetizer, Side Dish
- Method: Pickling
- Cuisine: American
Nutrition
- Serving Size: 1/2 cup
- Calories: 25
- Sugar: 2g
- Sodium: 480mg
- Fat: 0g
- Saturated Fat: 0g
- Unsaturated Fat: 0g
- Trans Fat: 0g
- Carbohydrates: 5g
- Fiber: 2g
- Protein: 1g
- Cholesterol: 0mg
Keywords: Refrigerator Pickles, Pickled Vegetables, Homemade Pickles, Pickling Recipe


