
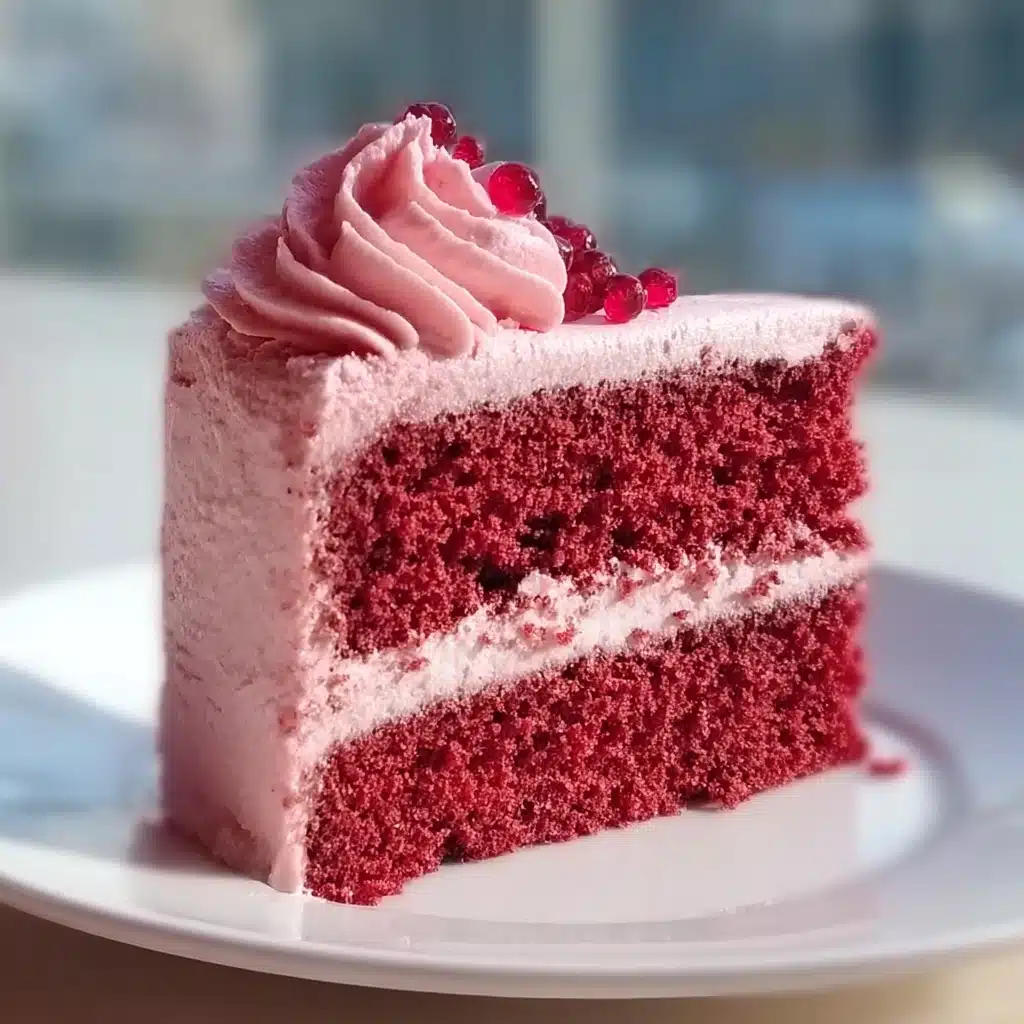
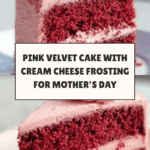
Mother’s Day Pink Velvet Cake Recipe
There is something truly magical about the Mother’s Day Pink Velvet Cake. This beautiful dessert combines the delicate softness of a classic velvet cake with a gentle pink hue that instantly brightens any celebration. It’s moist, subtly chocolatey with the perfect hint of vanilla, and finished with a luscious cream cheese frosting that makes every bite a moment of pure joy. Whether you are celebrating your own mom or simply indulging in a sweet treat, this cake has the power to make Mother’s Day feel extra special and memorable.
Ingredients You’ll Need
Gathering these simple but essential ingredients is the first step to creating your stunning Mother’s Day Pink Velvet Cake. Each element plays a vital role: from the tender texture given by cake flour to the creamy richness of the frosting, and of course, that signature pink color that sets this dessert apart.
- 2 ½ cups cake flour: Provides a light and tender crumb that’s perfect for velvet cakes.
- 1 ¾ cups granulated sugar: Sweetens the cake beautifully without overpowering the other flavors.
- ½ cup unsweetened cocoa powder: Adds subtle chocolate notes that balance the sweetness.
- 1 tbsp baking powder: Ensures the cake rises to a soft, fluffy perfection.
- ½ tsp salt: Enhances all the flavors while keeping the sweetness in check.
- ¾ cup unsalted butter, softened: Brings rich moisture and tender texture to the cake.
- 4 large eggs (room temperature): Help bind everything together and add structure.
- 1 cup buttermilk: Adds tanginess that balances the sweetness and keeps the cake moist.
- 2 tsp pure vanilla extract: Elevates the flavor with warm, comforting notes.
- Red food coloring: The magic touch for achieving that perfect pink shade.
- Cream cheese frosting: The creamy, tangy topping that makes this cake unforgettable.
How to Make Mother’s Day Pink Velvet Cake
Step 1: Preheat and Prepare the Pans
Start by preheating your oven to 350°F (175°C). While it’s warming up, grease and flour two 9-inch round cake pans. This simple prep step ensures your cakes release easily after baking, helping you maintain that flawless shape.
Step 2: Mix the Dry Ingredients
In a large bowl, whisk together the cake flour, cocoa powder, baking powder, and salt. Combining these dry ingredients early keeps the cocoa evenly distributed and avoids any lumps—setting you up for a smooth batter later.
Step 3: Cream Butter and Sugar
In a separate bowl, beat the softened butter and sugar together until the mixture turns light and fluffy—about 3 minutes. This process is key for incorporating air, which gives your cake its tender crumb and delightful lift.
Step 4: Beat in Eggs One at a Time
Next, add the eggs one at a time to the butter-sugar mixture, beating well after each addition. This step ensures the eggs properly emulsify with the butter, lending to an even texture and rich flavor.
Step 5: Add Wet Ingredients and Color
Mix in the buttermilk, vanilla extract, and red food coloring into the wet batter. The buttermilk’s tangy notes balance the sweetness, while the vanilla deepens the flavor. The red food coloring gives the cake its signature rosy pink hue, so add gradually until you reach your desired color.
Step 6: Combine Wet and Dry Mixtures
Gently fold the dry ingredients into the wet mixture until the batter is smooth and uniform. Be careful not to overmix—this helps keep your cake tender and soft once baked.
Step 7: Bake to Perfection
Divide the batter evenly between your two prepared pans. Bake for 25-30 minutes, or until a toothpick inserted in the center comes out clean. The aroma at this stage is heavenly and signals your cake is almost ready.
Step 8: Cool Before Frosting
Allow your cakes to cool for about 10 minutes in the pans before transferring them to wire racks to cool completely. Frosting warm cake can cause the frosting to melt, so patience here will reward you with a beautiful finish.
Step 9: Frost with Cream Cheese Frosting
Once cooled, generously frost your layers with smooth cream cheese frosting. This creamy, tangy topping perfectly complements the light chocolate flavor and adds a touch of luxury to your Mother’s Day Pink Velvet Cake.
How to Serve Mother’s Day Pink Velvet Cake

Garnishes
For a charming presentation, sprinkle some edible rose petals or delicate fresh strawberries on top. These natural garnishes echo the cake’s pink theme and deliver a fresh bite to balance the richness of the frosting.
Side Dishes
Serve slices alongside a cup of Earl Grey tea or a light raspberry sorbet for a refreshing contrast. These sides keep the experience light and elevate the celebration with complementary flavors.
Creative Ways to Present
Try layering your cake into a beautiful stack with even frosting in between, then pipe decorative swirls around the edges. Alternatively, present it on a vintage cake stand with soft linens and fresh flowers to create a truly festive Mother’s Day centerpiece.
Make Ahead and Storage
Storing Leftovers
Wrap leftover cake tightly with plastic wrap and store in the refrigerator. This keeps the cake moist and the cream cheese frosting fresh for up to 3 days, making it easy to enjoy your creation over time.
Freezing
For longer storage, freeze uncut cake layers wrapped securely in plastic and foil. When ready, thaw overnight in the refrigerator before frosting. This way, you can prepare your Mother’s Day Pink Velvet Cake ahead and still enjoy freshness on the big day.
Reheating
If you prefer your cake at room temperature, allow it to sit out for about 30 minutes after refrigeration. Avoid microwaving, as this can affect texture and melt frosting. Enjoy each slice at its best by serving it gently warmed with your favorite hot beverage.
FAQs
Can I use regular milk instead of buttermilk?
Yes, you can substitute regular milk, but adding a tablespoon of lemon juice or vinegar to one cup of milk mimics the acidity of buttermilk, which helps tenderize the cake and adds a subtle tang.
How do I get the perfect pink color?
Use gel-based red food coloring for a brighter and more vibrant pink without altering the batter’s consistency. Add the coloring gradually until you achieve the shade you love.
Can I make this cake gluten-free?
With some adjustments, yes! Substitute cake flour with a gluten-free blend designed for baking and ensure other ingredients are gluten-free. Expect slightly different texture, but still delicious.
Is cream cheese frosting the only option?
While cream cheese frosting pairs wonderfully with this cake, you can also try vanilla buttercream or whipped cream frosting, depending on your taste preferences. Each offers a unique twist.
How long does the cake keep fresh?
Stored properly in the refrigerator, your Mother’s Day Pink Velvet Cake stays fresh for up to 3 days. For best flavor and texture, enjoy it within this time frame.
Final Thoughts
Making the Mother’s Day Pink Velvet Cake is not only a delicious way to celebrate but also an invitation to create sweet memories with those you love. This cake’s soft texture, vibrant color, and luscious frosting promise to brighten any table and warm any heart. So grab your ingredients, roll up your sleeves, and bake this beautiful cake—your mom (or anyone special) will feel truly cherished with every bite.
Print
Mother’s Day Pink Velvet Cake Recipe
- Total Time: 50 minutes
- Yield: 12 servings 1x
- Diet: Vegetarian
Description
Celebrate Mother’s Day with this vibrant and delicious Pink Velvet Cake, featuring a moist cocoa-infused cake with a beautiful pink hue and topped with creamy, tangy cream cheese frosting. Perfect for making mom feel extra special with every bite!
Ingredients
Dry Ingredients
- 2 ½ cups cake flour
- ½ cup unsweetened cocoa powder
- 1 tbsp baking powder
- ½ tsp salt
Wet Ingredients
- ¾ cup unsalted butter, softened
- 1 ¾ cups granulated sugar
- 4 large eggs (room temperature)
- 1 cup buttermilk
- 2 tsp pure vanilla extract
- Red food coloring (to achieve desired pink hue)
Topping
- Cream cheese frosting (for topping)
Instructions
- Preheat Oven and Prepare Pans: Preheat your oven to 350°F (175°C). Grease and flour two 9-inch round cake pans to ensure the cakes release easily after baking.
- Mix Dry Ingredients: In a medium bowl, whisk together the cake flour, unsweetened cocoa powder, baking powder, and salt until uniformly combined.
- Cream Butter and Sugar: In a separate large bowl, use an electric mixer to cream the softened unsalted butter and granulated sugar together until the mixture is light and fluffy, about 3 minutes.
- Add Eggs: Beat in the eggs one at a time, making sure each egg is fully incorporated before adding the next, to achieve a smooth batter.
- Incorporate Wet Ingredients: Add the buttermilk, pure vanilla extract, and red food coloring to the mixture. Mix thoroughly until the color and ingredients are well blended.
- Combine Dry and Wet Ingredients: Gradually fold the dry ingredient mixture into the wet ingredients, stirring gently until the batter is smooth and homogenous.
- Bake the Cake: Evenly divide the batter between the two prepared cake pans. Bake in the preheated oven for 25-30 minutes or until a toothpick inserted into the center comes out clean.
- Cool the Cakes: Allow the cakes to cool in the pans for 10 minutes before transferring them to wire racks to cool completely, ensuring they set perfectly for frosting.
- Frost the Cake: Once completely cooled, frost the cakes generously with cream cheese frosting, spreading it evenly across the top and sides for a decadent finish.
Notes
- Using room temperature eggs and butter helps achieve a smoother batter and better rise.
- Adjust red food coloring gradually to reach your desired pink shade.
- For a dairy-free version, substitute buttermilk with almond milk mixed with lemon juice and use a dairy-free cream cheese frosting.
- Ensure cakes are fully cooled before frosting to prevent melting.
- This cake can be stored covered in the refrigerator for up to 3 days.
- Prep Time: 20 minutes
- Cook Time: 30 minutes
- Category: Dessert
- Method: Baking
- Cuisine: American
Nutrition
- Serving Size: 1 slice (1/12th of cake)
- Calories: 380
- Sugar: 28g
- Sodium: 220mg
- Fat: 18g
- Saturated Fat: 10g
- Unsaturated Fat: 7g
- Trans Fat: 0.3g
- Carbohydrates: 50g
- Fiber: 1.5g
- Protein: 5g
- Cholesterol: 80mg
Keywords: Pink Velvet Cake, Mother’s Day Cake, Cream Cheese Frosting, Celebration Cake, Chocolate Cake, Red Food Coloring Cake